
Smile Design Guide
Design in 1 step
The new AI automation takes you directly to the part you love most: Design
- Click on Projects
- Select Smile Design
- Select your portrait from the right side
- Start exploring the Smile Design Proposals from the AI-selected compositions or, customize them by changing each tooth.
Adjust portrait position
Your Design tool box has been simplified and optimised, to get you faster to the result you need. On the right side of your design screen, you have the tools which allow you to fine tune your design.
- Click on the first icon and adjust position if necessary
- Add guidelines from the top or left side to guide your face position
- Remove guidelines when needed by dragging them outside of the page
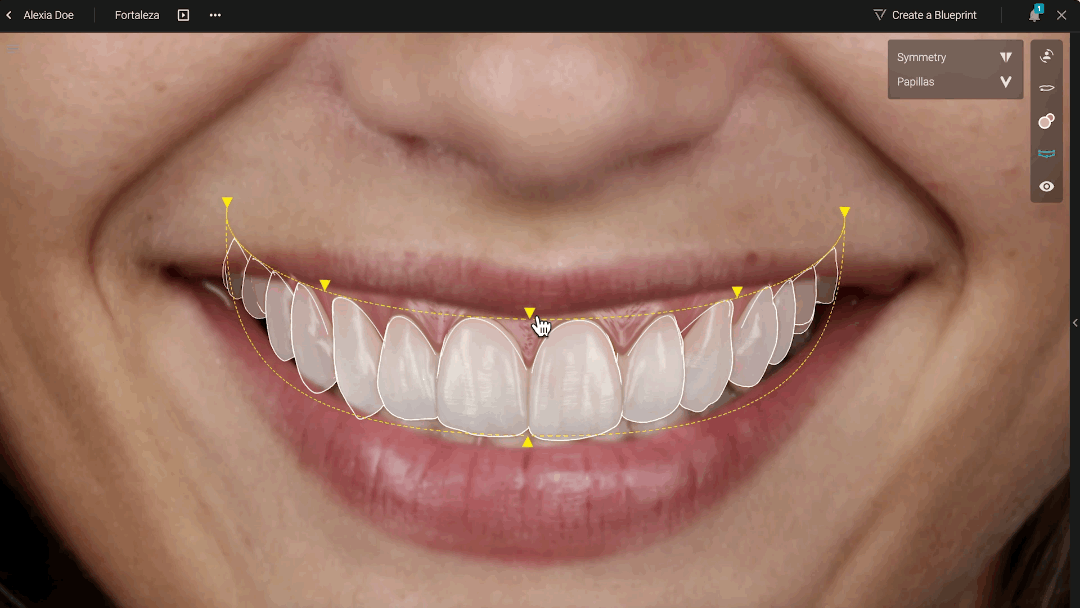
Adjust lip contour
The lip contour is AI detected but can be highly customised with additional points:
- Add points by clicking on the yellow line
- Move points by dragging them with your mouse
- To Remove points, select them with your mouse and hit the DELETE key on your keyboard
Adjust color of Gingiva and Teeth
We've added advanced color controls that allow to you optimise your smile simulation:
- Adjust Gingiva color
- Adjust Teeth Value and Chroma
- Adjust the Hue (temperature of the simultation)
Adjust Restorative Space
The restorative space is automated, and improved.
- The symmetry button when turned on, will allow you to make symmetric adjustments on both arches. Turned off, will allow you to make asymmetric adjustments on the restorative space. This is valid for any adjustments you will make.
- The Papillas button activates the papillas toolkit, allowing you to position them according to your restorative space.
Move restorative space
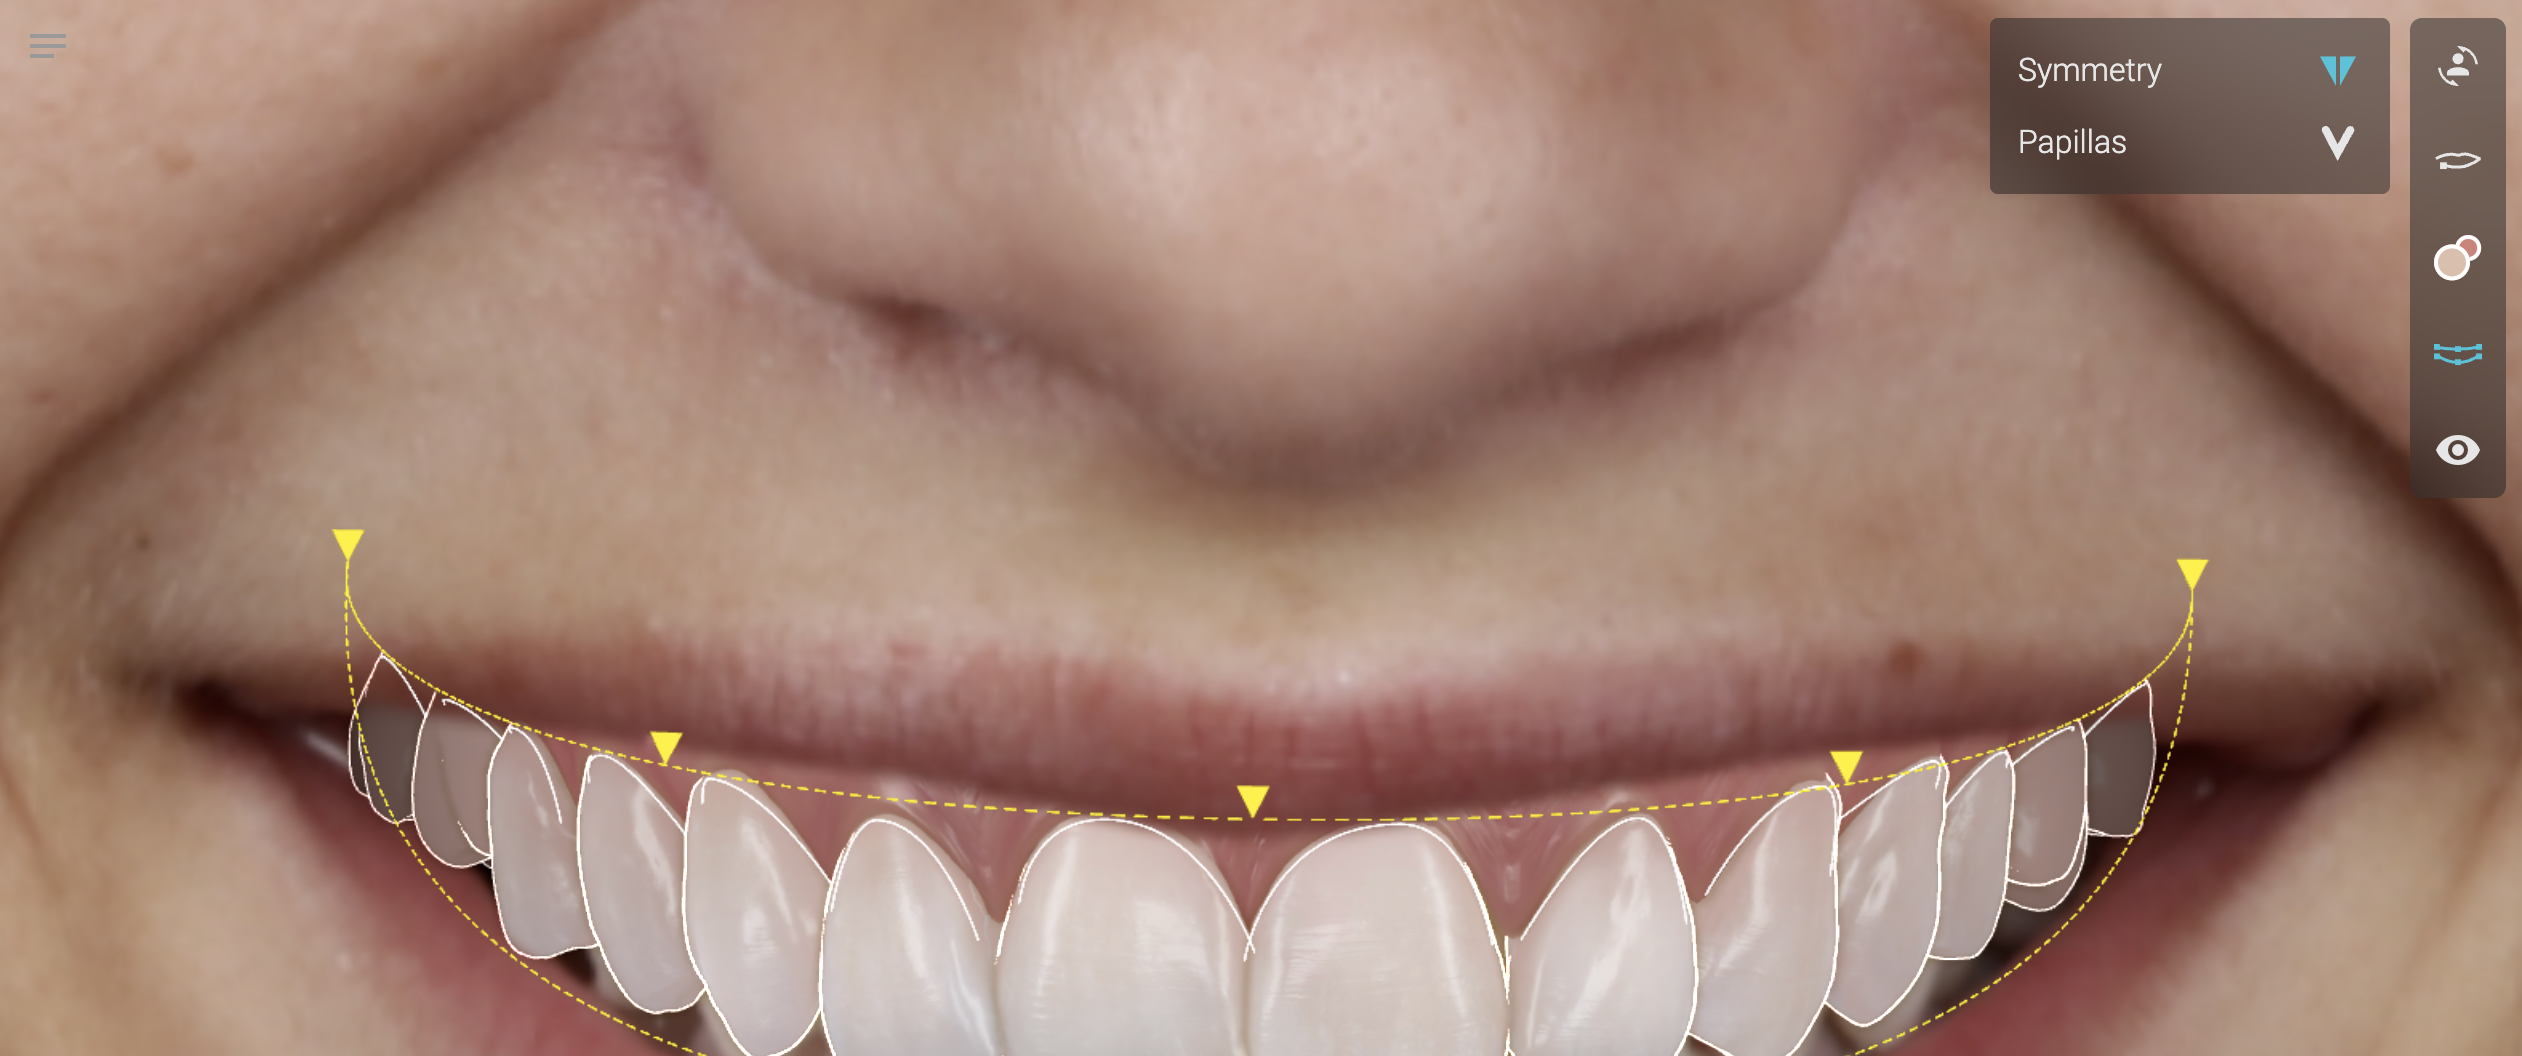
 Adjust Smile Curve
Grab the outer corners of the restorative space and drag them to the desired position.Turn the Symmetry control on or off.
Adjust proportions
Adjust horizontal or lateral proportions. Turn the Symmetry control on or off.
Adjust arch dimension
Adjust the restorative space to match a narrow or a wide arch. Turn the Symmetry control on or off.
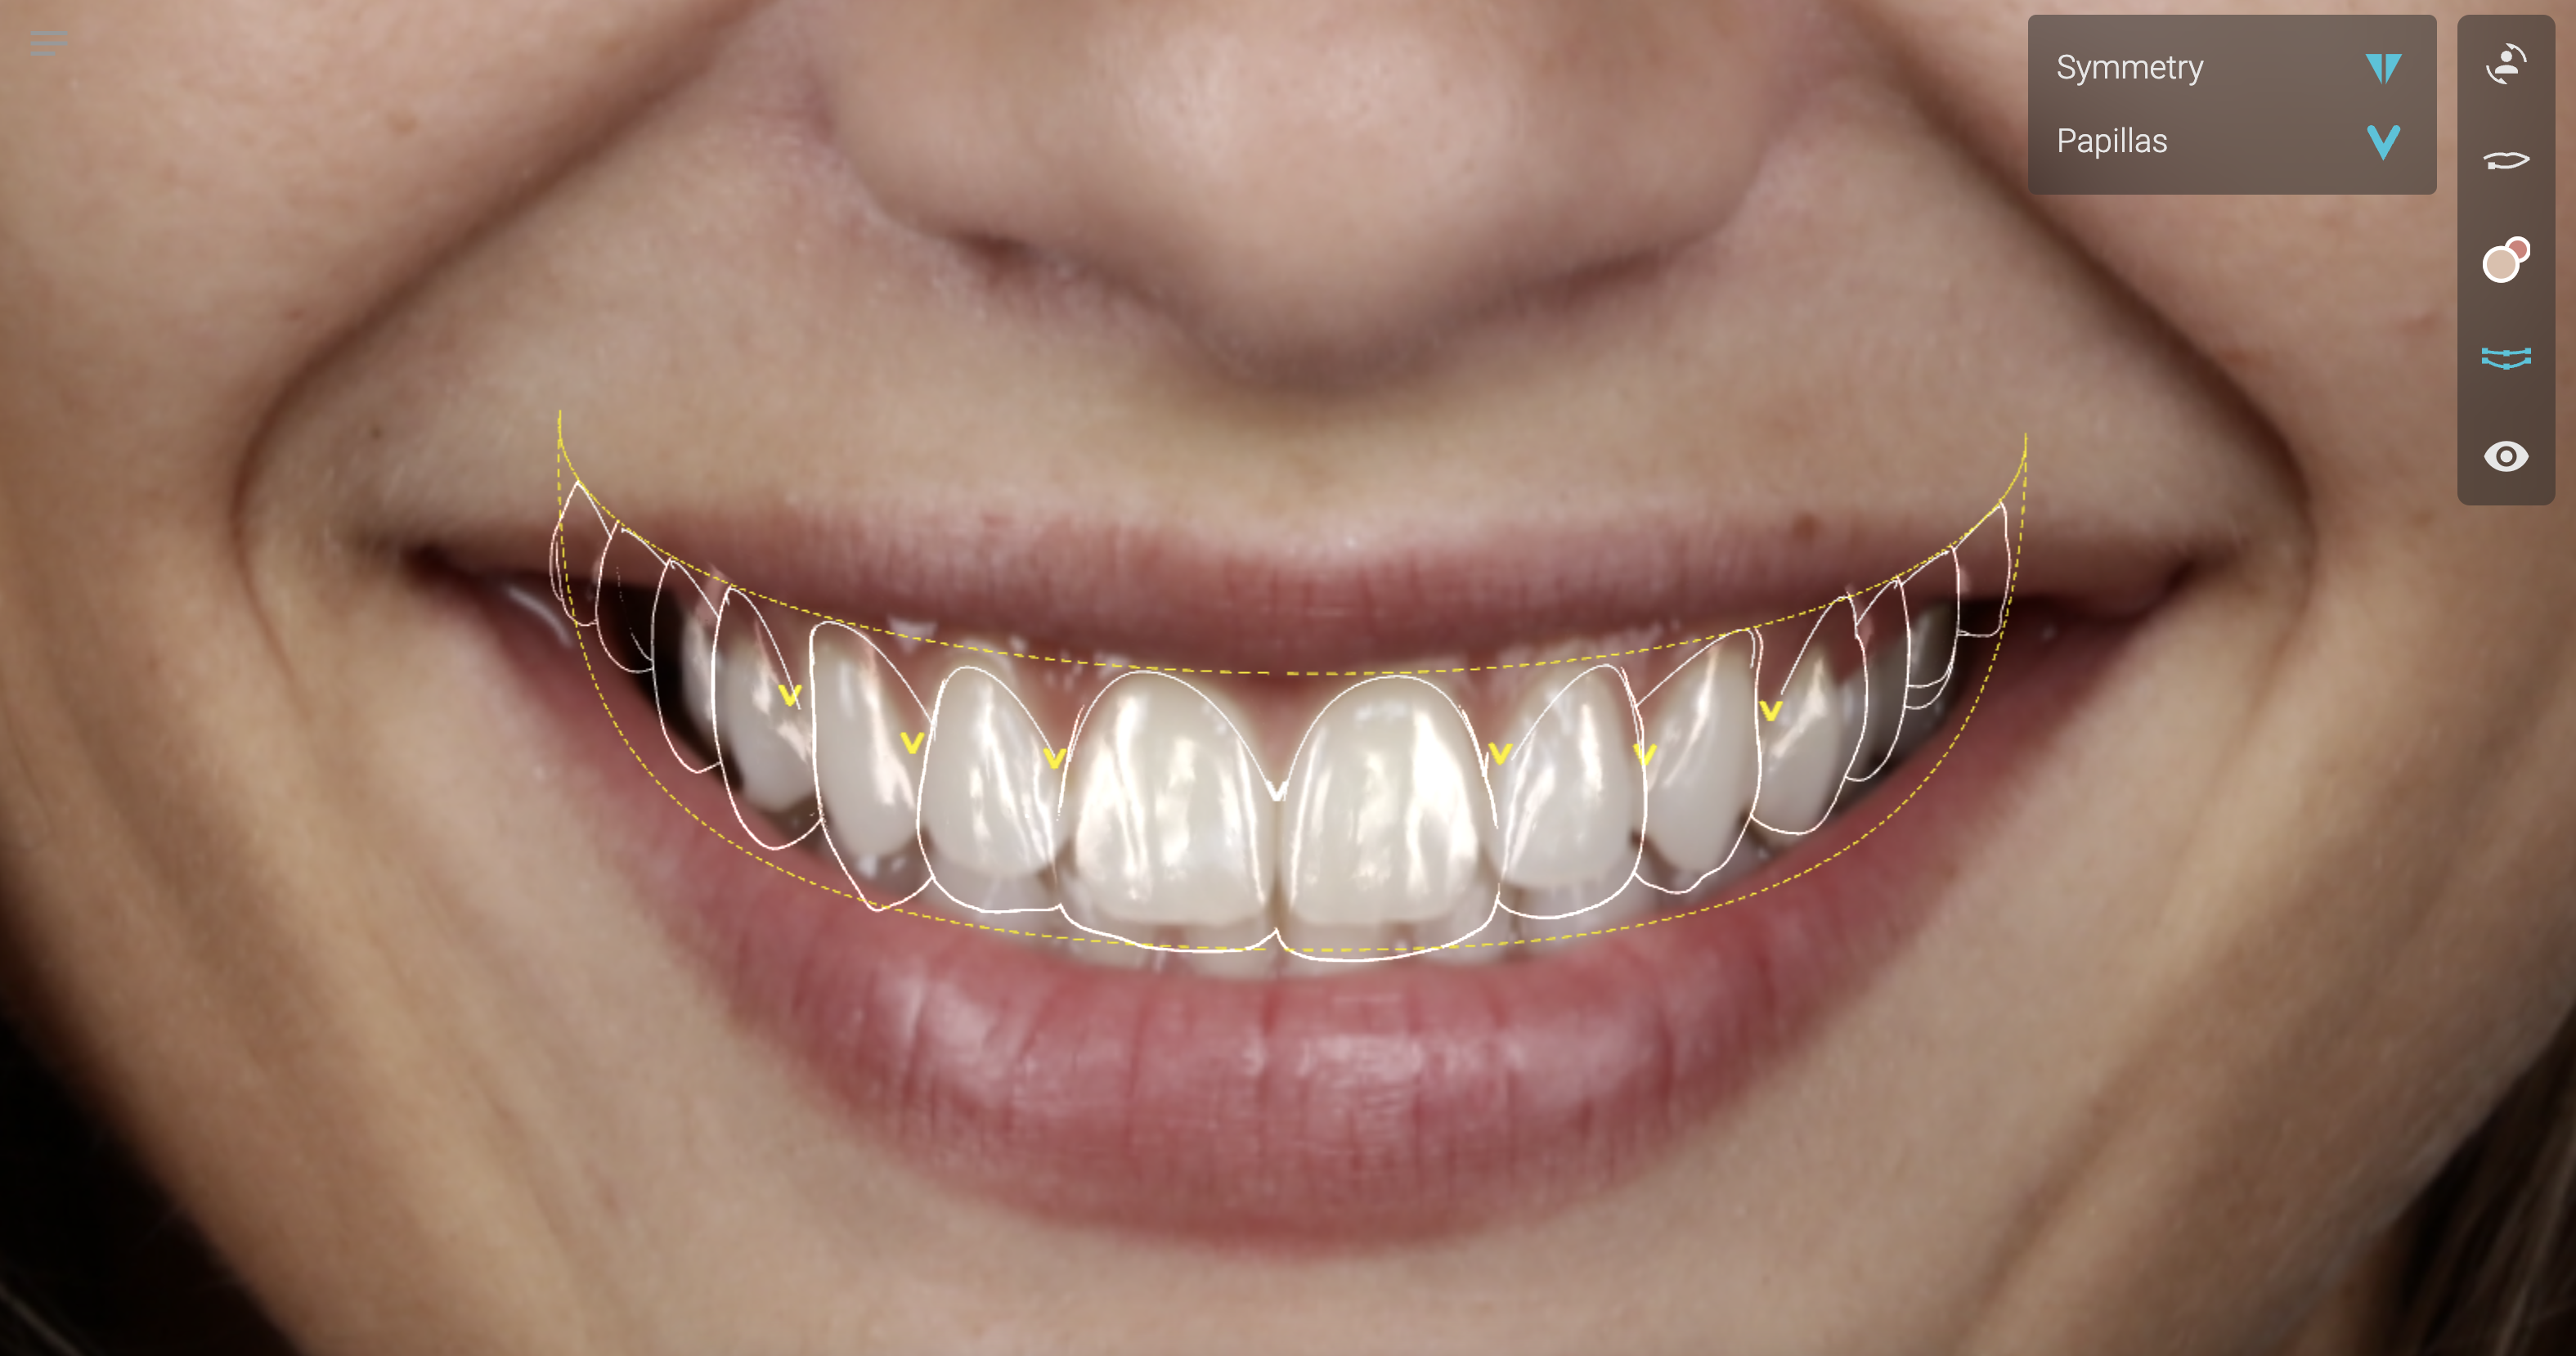
Adjust Papillas
Click the Papillas button, and drag the papilla points with your mouse. An automatic % number will appear. This is the ratio between the length of the tooth and papilla length.
Libraries and "The Gimbal"
Click on a tooth to show the Gimbal - the control toll for libraries Or, use the "G Key" on your keyboard. This new powerful tool that allows you to:
- Scale (bigger or smaller) - Drag on the outer circle
- Rotate on horizontal axis - Drag the inner circle
- Change sagital position (vestibular or buccal) - Push or pull from the inner arrow
- Rotate on it's own axis - Hold Command Or Control on your keyboard and drag your mouse
Hide Patient teeth
This will come in handy when your design is reducing the length of the original teeth.